Beginner Guide to Herbs in Pots
Imagine stepping outside your door and snipping fresh basil for pasta, or adding a sprig of rosemary to your roasted chicken, all without leaving home. Growing your own herbs is not only incredibly satisfying, but it's also easier than you might think, especially when you start with pots!
Herbs bring so much to our lives. They enhance our cooking with vibrant flavors, fill our homes with delightful aromas, and offer potential health benefits. Plus, growing herbs in pots is a fantastic way to enjoy fresh ingredients even if you have limited space, like a small balcony or just a sunny windowsill. This beginner guide will show you how to successfully cultivate a thriving herb garden in pots, bringing a touch of green magic into your daily routine.
Choosing the Best Herbs for Your Pots
The first step to a successful container herb garden is selecting the right herbs. Some herbs are naturally better suited to growing in pots than others. Consider both your personal preferences and the growing conditions you can provide.
Here are a few excellent choices for beginners: Basil: A culinary staple, basil thrives in warm, sunny locations. Choose compact varieties like 'Spicy Globe' or 'Genovese' for containers. Mint: Known for its refreshing flavor, mint is vigorous and can quickly take over a garden bed. Growing it in a pot keeps it contained. Be aware that mint needs frequent watering. Chives: These onion-flavored herbs are easy to grow and add a delicate zest to many dishes. They’re also quite cold-hardy, often bouncing back in spring after a cold winter. Rosemary: This fragrant herb prefers well-drained soil and plenty of sunshine. Choose a smaller variety if possible, but regular pruning can keep larger varieties manageable. Thyme: With its earthy flavor, thyme is a versatile herb that thrives in dry, sunny conditions. Creeping thyme varieties are beautiful spilling over the edges of pots. Parsley: Flat-leaf and curly parsley are both easy to grow and provide a fresh, clean flavor. Parsley likes consistently moist soil. Oregano:Another Mediterranean favorite, oregano is easy to grow and tolerates dry conditions. Pinch back the tips regularly to encourage bushier growth.
Consider which herbs you use most often in your cooking. There's no point in growing something you won't actually use! Think about the space and sunlight you have available. A sunny balcony is perfect for Mediterranean herbs like rosemary and thyme, while a partially shaded patio might be better suited to mint and parsley.
Essential Supplies for Your Container Herb Garden
Before you start planting, gather the necessary supplies. Having everything on hand will make the process smoother and more enjoyable.
Here's what you'll need: Pots: Choose pots that are at least 6-8 inches in diameter to give your herbs enough room to grow. Ensure they have drainage holes to prevent waterlogging. Terracotta pots are a classic choice, but plastic or glazed pots work well too. Potting Mix: Use a high-quality potting mix specifically designed for containers. Garden soil is too heavy and doesn't drain well in pots. Avoid mixes with added fertilizers at first, as you can add fertilizer later as needed. Trowel: A small trowel is essential for digging holes and transplanting herbs. Watering Can: A watering can with a gentle rose (the sprinkle head) will help you water your herbs without disturbing the soil. Herb Plants or Seeds: You can start your herbs from seeds or purchase established plants from a nursery or garden center. For beginners, starting with plants is often easier and faster. Optional: Slow-Release Fertilizer: A slow-release fertilizer can provide your herbs with a steady supply of nutrients. Optional:Plant Labels: Labeling your herbs will help you remember what you planted and where.
Investing in quality supplies will set you up for success. Don't skimp on the potting mix – it's the foundation of your container herb garden!
Planting Your Herbs: A Step-by-Step Guide
Now for the fun part – planting your herbs! Follow these simple steps to get your container herb garden off to a great start:
1.Prepare the Pots: Fill the pots with potting mix, leaving about an inch of space at the top.
2.Planting from Seedlings: Gently remove the herb plants from their nursery containers. Loosen the roots slightly with your fingers.
3.Dig Holes: Dig holes in the potting mix that are large enough to accommodate the root balls of the herb plants.
4.Place the Herbs: Place the herb plants in the holes and gently pat the soil around them. Ensure the top of the root ball is level with the surrounding soil.
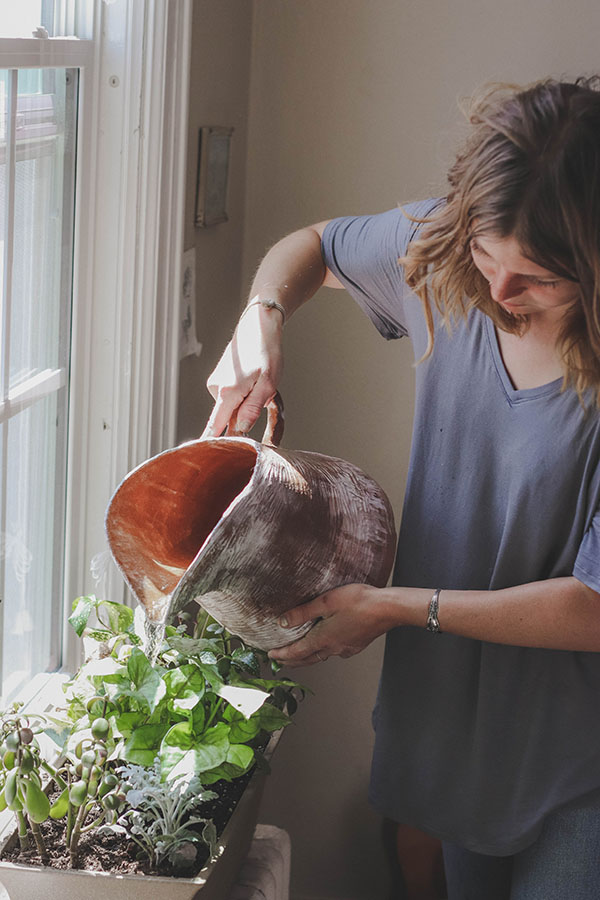
5.Water Thoroughly: Water the herbs thoroughly after planting, allowing the water to drain out of the drainage holes.
6.Add Plant Labels: Label each pot with the name of the herb.
7.Choose a Location: Place the pots in a location that receives the appropriate amount of sunlight for the herbs you are growing.
After planting, keep a close eye on your herbs. Check the soil moisture regularly and water when the top inch of soil feels dry to the touch.
Can herbs really grow indoors in winter?
Yes, many herbs can thrive indoors during winter with a little extra care. The key is providing enough light. A south-facing window is ideal, but if you don't have one, you may need to supplement with a grow light. Keep the herbs away from drafts and be mindful of overwatering, as indoor plants generally require less water than outdoor plants. Popular choices for indoor winter herbs include parsley, chives, mint, and oregano.
Caring for Your Potted Herbs
Proper care is essential for keeping your herb garden thriving. Here are some key tips: Watering: Water your herbs regularly, especially during hot, dry weather. Check the soil moisture daily and water when the top inch feels dry. Avoid overwatering, as this can lead to root rot. Fertilizing: Feed your herbs with a balanced liquid fertilizer every 2-4 weeks during the growing season. Alternatively, use a slow-release fertilizer at planting time. Pruning and Harvesting: Pruning your herbs regularly encourages bushier growth and prevents them from becoming leggy. Harvest herbs by snipping off the top leaves or stems. Regular harvesting actually promotes growth. Sunlight: Ensure your herbs receive the appropriate amount of sunlight. Most herbs need at least 6 hours of sunlight per day, but some, like mint and parsley, can tolerate partial shade. Pest Control: Keep an eye out for pests, such as aphids or spider mites. Treat infestations promptly with insecticidal soap or neem oil. Repotting: As your herbs grow, they may outgrow their pots. Repot them into larger containers as needed.
Regularly inspect your plants for signs of stress or disease. Addressing problems early on will help keep your herb garden healthy and productive.
Which herbs grow faster in pots?
Certain herbs are known for their relatively quick growth in containers. Basil, mint, and chives are generally fast growers, allowing you to enjoy fresh harvests sooner. Cilantro is another quick-growing option, but it tends to bolt (go to seed) quickly in hot weather, so succession planting every few weeks is recommended. Parsley also grows at a decent rate, providing you with fresh leaves throughout the growing season.
Troubleshooting Common Problems
Even with the best care, you may encounter some problems when growing herbs in pots. Here are some common issues and how to address them: Yellowing Leaves: This can be a sign of overwatering, underwatering, or nutrient deficiency. Adjust your watering schedule and fertilize your herbs as needed. Leggy Growth: This is often caused by insufficient sunlight. Move your herbs to a sunnier location or provide supplemental lighting. Pinch back the stems to encourage bushier growth. Pests: Inspect your herbs regularly for pests. Treat infestations with insecticidal soap or neem oil. Root Rot: This is caused by overwatering and poor drainage. Ensure your pots have drainage holes and avoid overwatering. If root rot is severe, you may need to repot your herbs with fresh potting mix. Bolting:Bolting is when a plant prematurely goes to seed, often triggered by heat stress. This makes the leaves bitter. Frequent harvesting can delay bolting, and providing shade during the hottest part of the day can also help.
Don't be discouraged if you encounter problems. Gardening is a learning process, and every challenge is an opportunity to improve your skills!
Harvesting and Using Your Fresh Herbs
One of the greatest rewards of growing your own herbs is being able to harvest them fresh for cooking and other uses.
Here are some tips for harvesting and using your herbs: Harvest in the Morning: The best time to harvest herbs is in the morning, after the dew has dried but before the sun gets too hot. This is when the essential oils are most concentrated, resulting in the best flavor. Use Sharp Scissors or Pruners: Use sharp scissors or pruners to harvest herbs. This will make clean cuts and prevent damage to the plants. Harvest Regularly: Regular harvesting encourages bushier growth and prevents herbs from becoming leggy. Use Fresh or Dried: Fresh herbs are best used immediately, but you can also dry them for later use. To dry herbs, hang them upside down in a cool, dry place or use a dehydrator. Culinary Uses: Add fresh herbs to your favorite dishes to enhance the flavor. Basil is delicious in pasta sauces and salads, rosemary pairs well with roasted meats, and mint adds a refreshing touch to beverages. Other Uses: Herbs can also be used for medicinal purposes, aromatherapy, and crafting.
Experiment with different herbs and find your favorite ways to use them. The possibilities are endless!
Growing herbs in pots is a simple yet rewarding way to bring fresh flavors and aromas into your life. Don't be afraid to experiment with different varieties and techniques. Every gardener learns through trial and error, and the joy of harvesting your own homegrown herbs is well worth the effort. So, grab your pots, soil, and seeds, and get ready to embark on a flavorful adventure! Happy gardening!
Post a Comment for "Beginner Guide to Herbs in Pots"